How to Set Up Prosox proxy With ixBrowser
Настройка прокси в антидетект браузере ixBrowser

Example: You purchased unlimited residential proxy servers from Prosox.io and received the following:
0Wva7syVx7Qh:[email protected]:5432
62.171.230.139:63060:prosoxPbfyz:9fSbyM7ce8RW
Why use ISP proxies: you get the same IP every time you start. This is ideal for long sessions: accounts, billings, payments, careful account management without IP “wobbling”.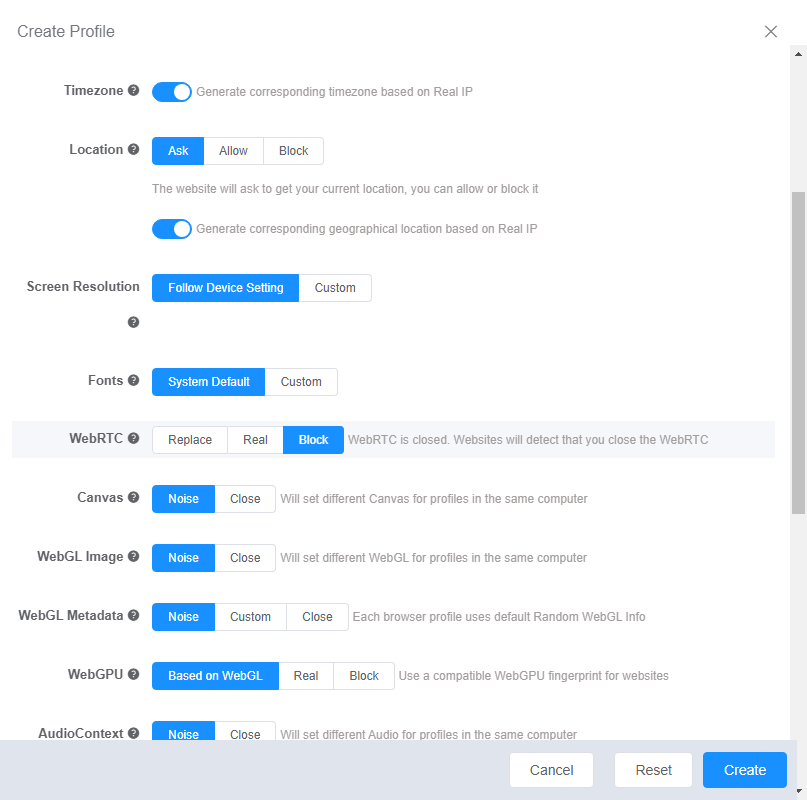
In the end, with these settings, your profile will look like a separate user – with its unique IP, device, language, and behavior pattern.

Download and install ixBrowser
- Open the official ixBrowser website in your browser.
- Click Download or go to the Pricing / Download page and select your operating system: Windows or macOS.

- Run the installer and follow the on-screen instructions. After installation, the ixBrowser authorization window will open.
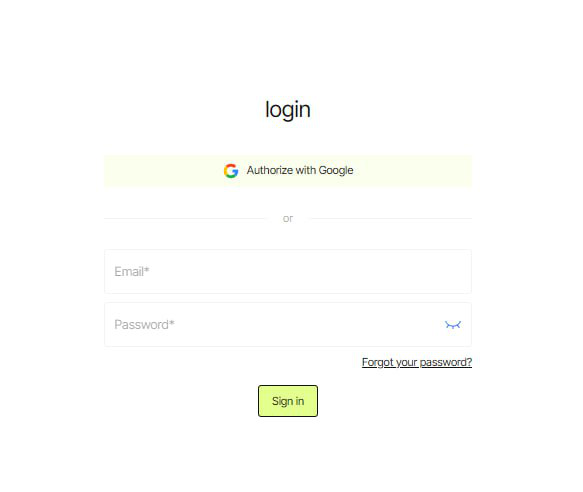
Register an account in ixBrowser
- Click Sign In/Register in the login window.
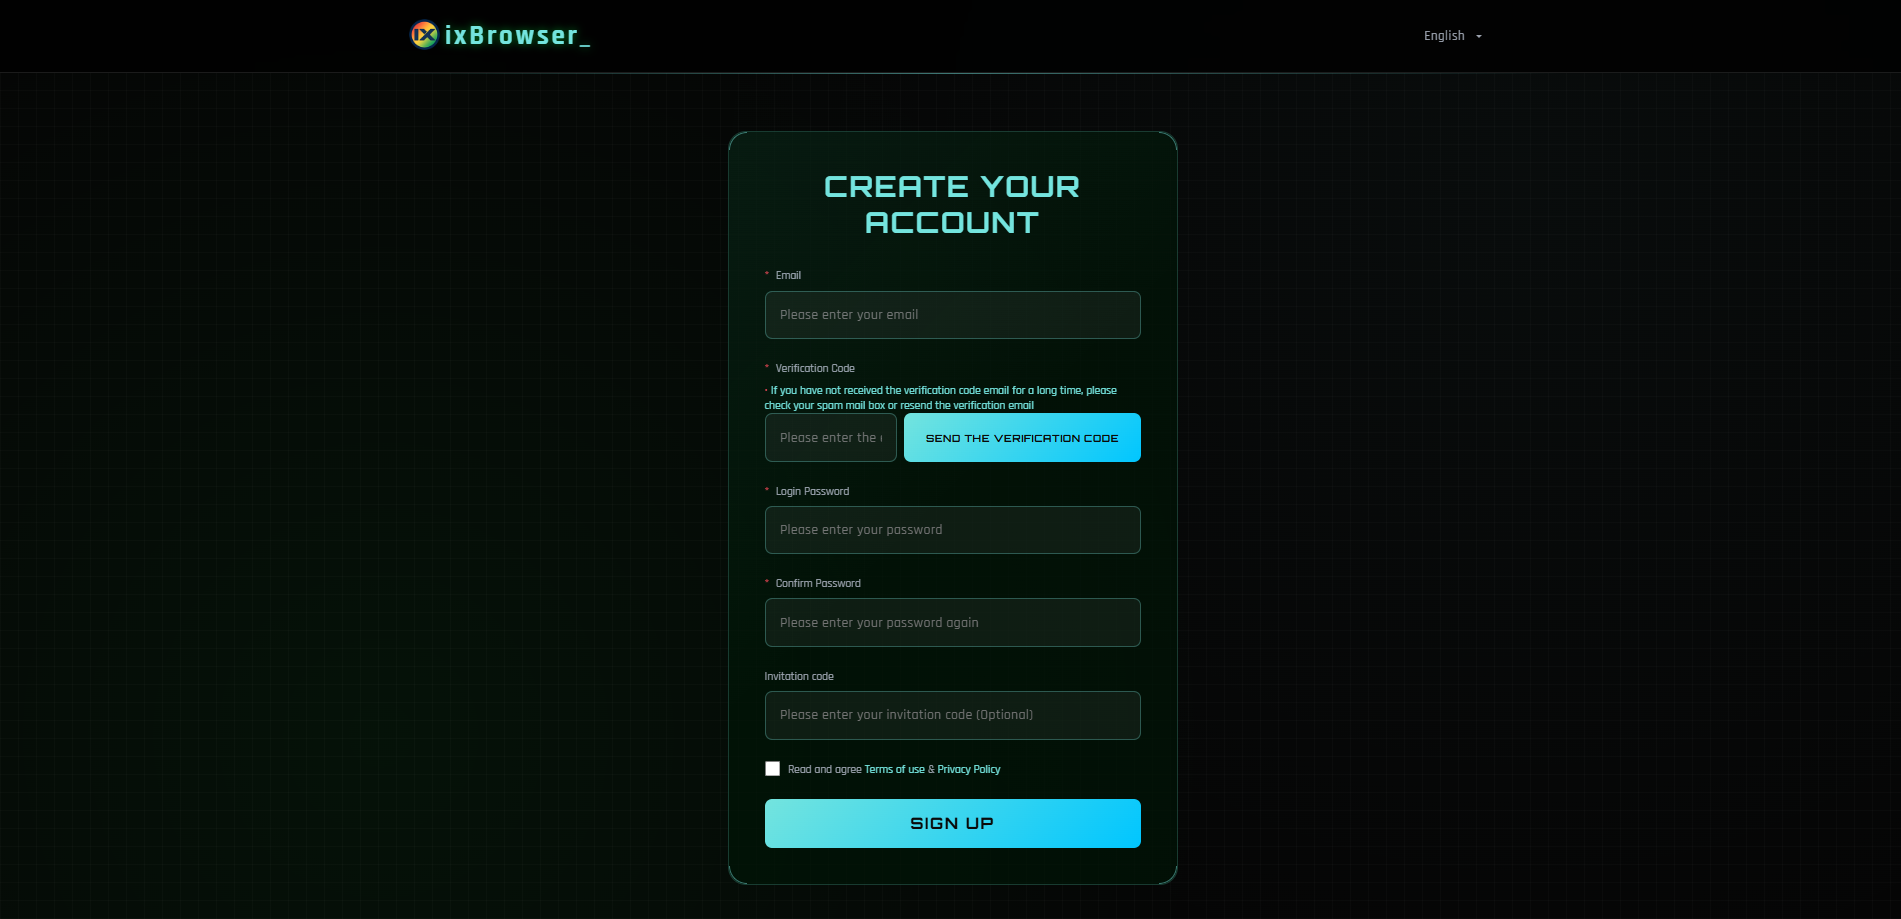
- If you already have an account, enter your email and password.
- If you don’t have an account, register via email, fill in all the fields, and confirm your email address.
You can also register using third-party service accounts if this option is available in the current version. - Return to the application and log in with your login and password.
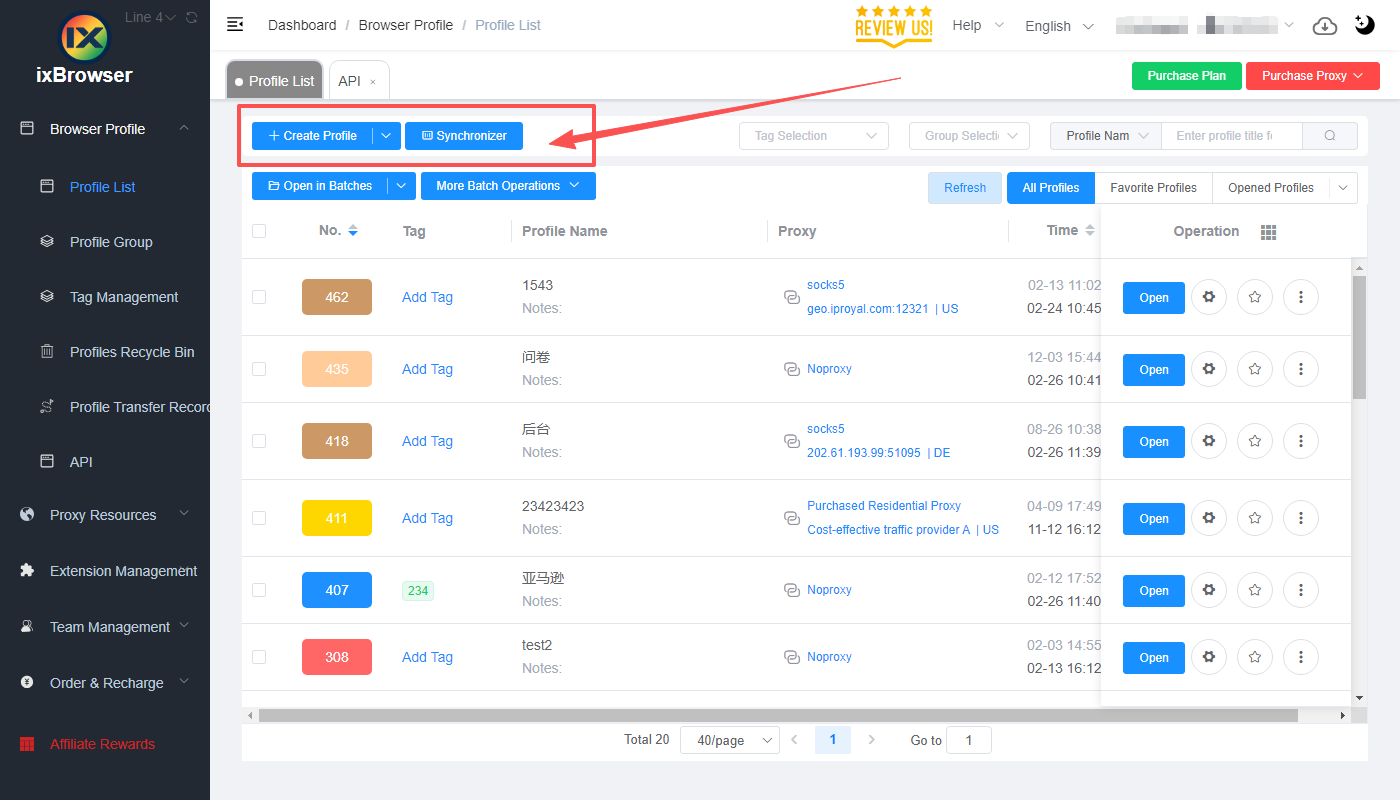
Creating your first profile in ixBrowser
- In ixBrowser, open the Profiles / Profile list section.
- To create a new profile, click Create profile at the top of the window.
- Enter a profile name (for example, Prosox test).
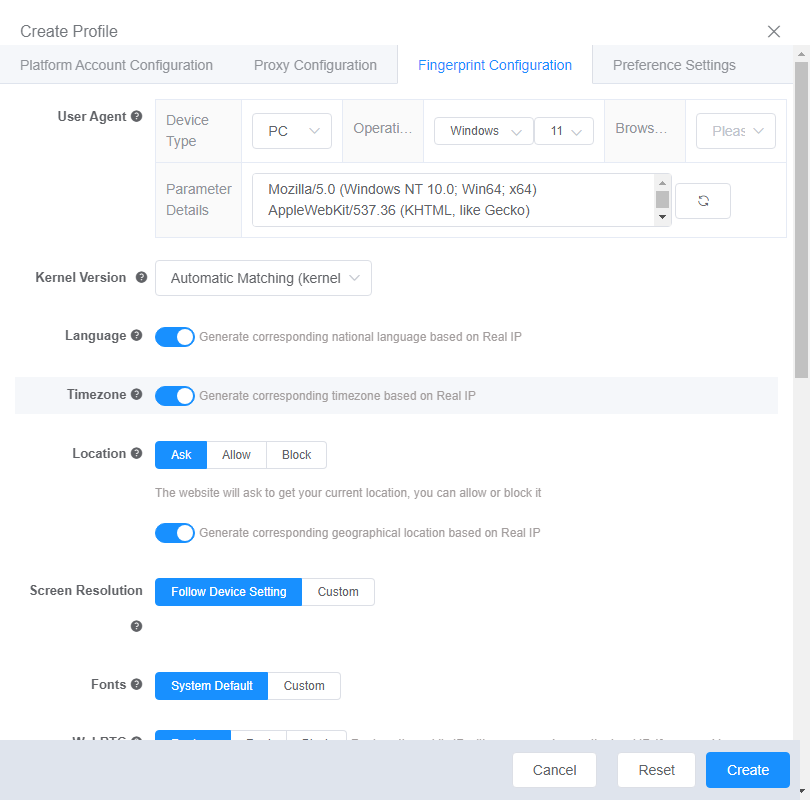
- Select the browser engine/core: Chrome or Firefox (leave it as default if you are not sure).
- OS: specify the environment — macOS or Windows.
- User-Agent: leave auto-selection in ixBrowser for optimal masking.
- Go to the Proxy section (or the “Proxy Settings” tab).
Preparing proxy data in Prosox
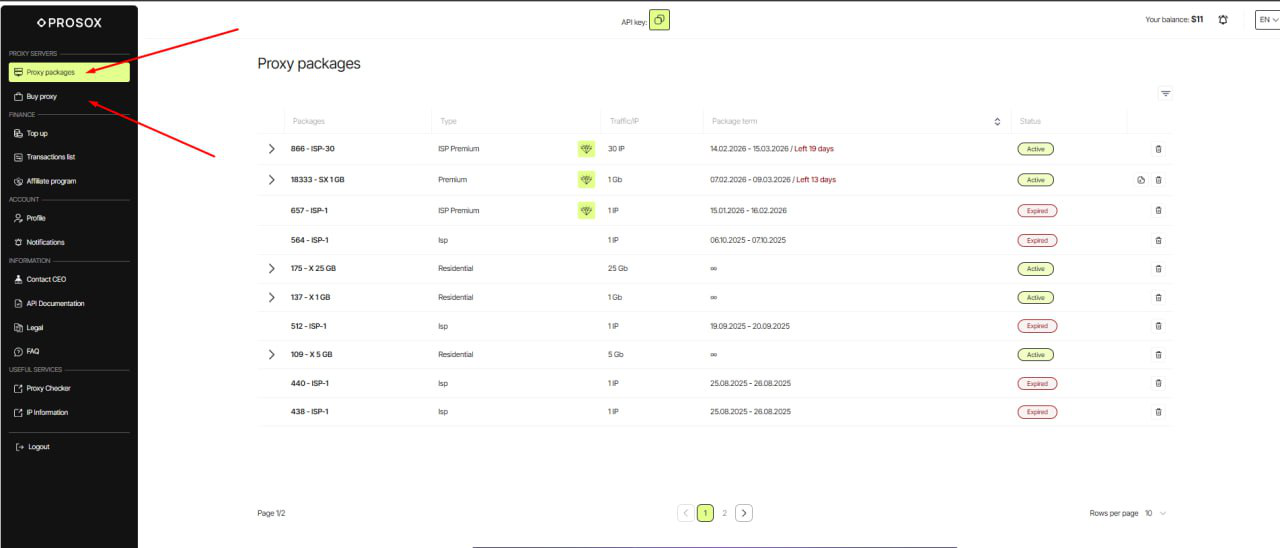
- Log into your Prosox account. If you don’t have an it yet, you can create one by confirming email.
- Go to the “Proxy List” page if you already have proxies, or buy proxies if you haven’t done so yet.
- Select plan/proxy type:
- Residential (rotational) – for “picky” sites, parsing, advertising. IPs can change.
-
- ISP (static) – the same stable IP for long sessions, accounts, payments.
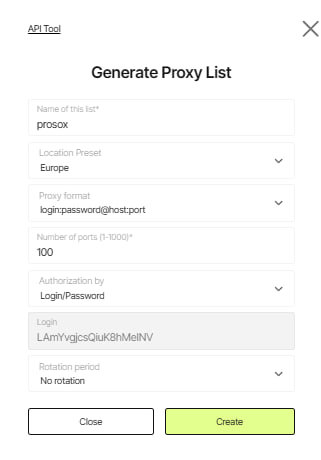
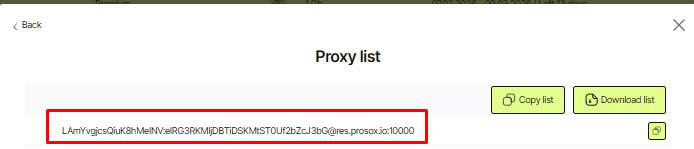
- Copy the connection parameters.
Connecting Prosox RESIDENTIAL Proxies
Example: You purchased unlimited residential proxy servers from Prosox.io and received the following:0Wva7syVx7Qh:[email protected]:5432
- Fill in the fields:
- In the proxy type field, select HTTPS or SOCKS5 (whichever is specified in your Prosox).
- Host: enter your HOST from Prosox (example: 84.55.4.64)
- Port: 5432
- Login: 0Wva7syVx7Qh
- Password: sikjfc9v
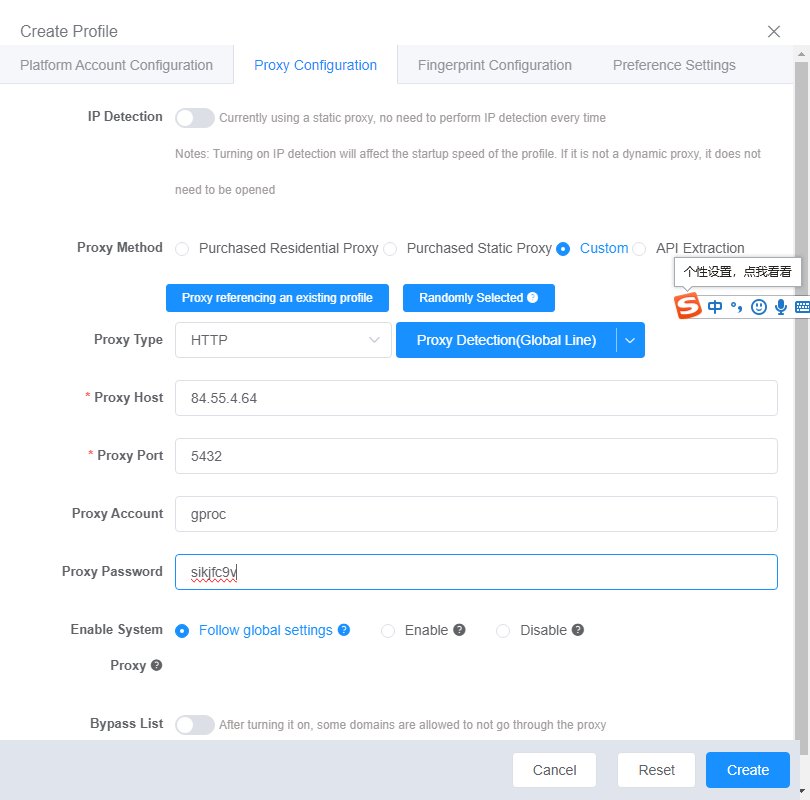
- Proxy check.
- Click check proxy.

- Green status — everything is ok, let’s move on.
- Red — double-check the data.
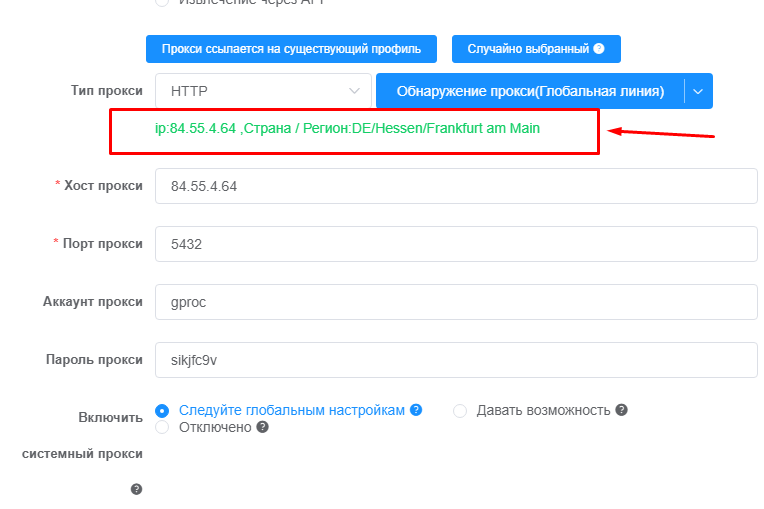
- Click check proxy.
Connecting Prosox ISP (STATIC) Proxies
Example: You purchased USA proxy servers from Prosox.io and received the following:62.171.230.139:63060:prosoxPbfyz:9fSbyM7ce8RW
- In the proxy type field, select HTTPS or SOCKS5 (whichever is specified in your Prosox).
- Host: paste your HOST from Prosox (62.171.230.139)
- Port: 63060
- Login: prosoxPbfyz
- Password: 9fSbyM7ce8RW
- Click Check proxy.
- Click Save Profile.
Why use ISP proxies: you get the same IP every time you start. This is ideal for long sessions: accounts, billings, payments, careful account management without IP “wobbling”.
Setting up “Fingerprints” (to Reduce Blockages)
Make the profile as similar as possible to a regular user’s computer:- WebRTC: turn it off so as not to “expose” the real IP.
- Time zone: set it automatically by IP to avoid inconsistencies.
- Geolocation: synchronize with the IP address.
- System language: select the language that corresponds to the IP country/city.
- Application/browser language: the same as the language by IP.
- Screen resolution: use typical presets — this looks more natural.
- Fonts: leave the standard sets to avoid standing out.
- Hardware “noise”: enable all simulation options — this brings the behavior closer to a real device.
- WebGL (metadata): specify common manufacturer/renderer values (for example, “Google Inc.”, “Apple”).
- WebGPU: configure according to WebGL parameters
In the end, with these settings, your profile will look like a separate user – with its unique IP, device, language, and behavior pattern.
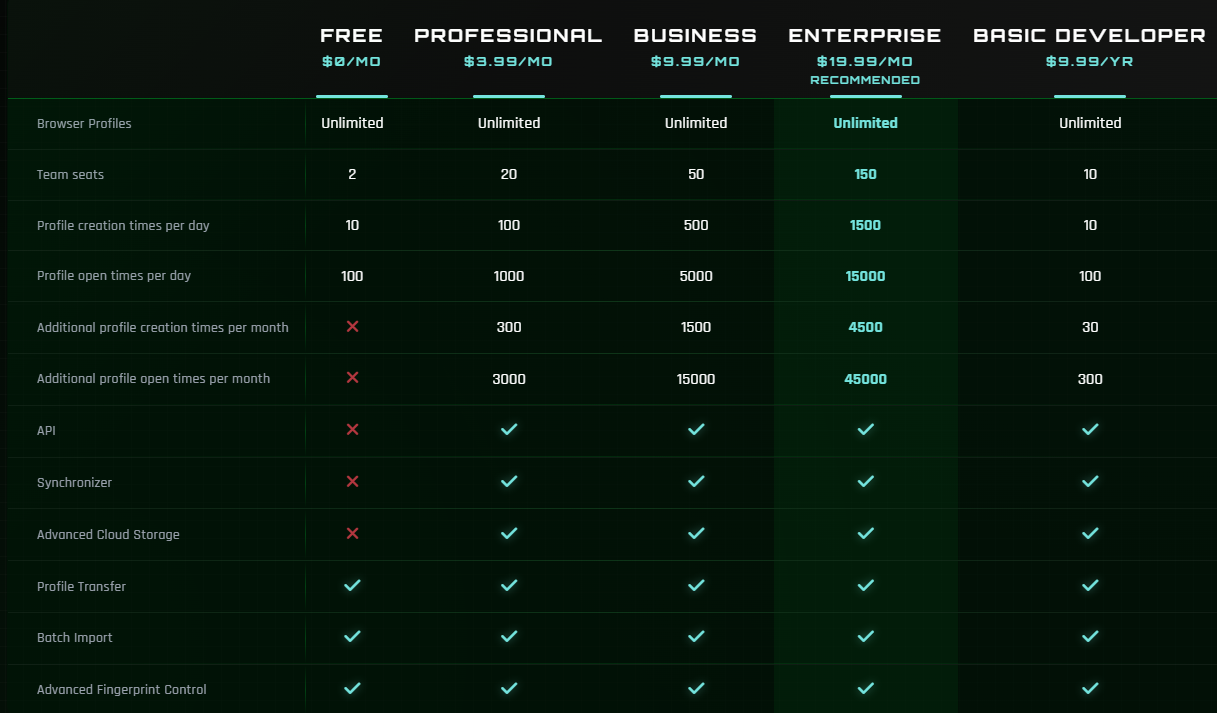
Pricing Plans
You can choose an ixBrowser tariff plan depending on your needs:- Free plan: ability to manage an unlimited number of profiles with restrictions on functionality and the number of simultaneous launches.
- Paid plans: starting at approximately $3.99 per month, with expanded limits, support, and additional features.